

Litter-Robot III Open Air - About The Hall Effect Sensor

Most of you are here because there are 3 lights blinking on the control panel of your Litter-Robot. Sometimes, this problem is caused by a faulty power supply or the motor itself. If even after verifying the set screw on the motor and checking the voltage on the power supply with a multimeter, the lights are still flashing, you will probably need to replace the Hall Effect Sensor.
Before you do so, make sure that your globe and its magnets are all okay and well in place.
If the control panel's lights are blinking, from right to left, from left to right or all together, the issue is still the same: the robot couldn't track the position of the Globe properly. That's the Hall Effect Sensor's purpose; it's what makes your Litter-Robot so intelligent. These sensors are designed to react to any magnetic field. When the globe rotates, the magnets inside the globe will trigger the hall effect sensor, allowing the Litter-Robot to know the exact position of the globe.
Follow these steps and you will be able to replace the complete Wiring Harness without any problem.
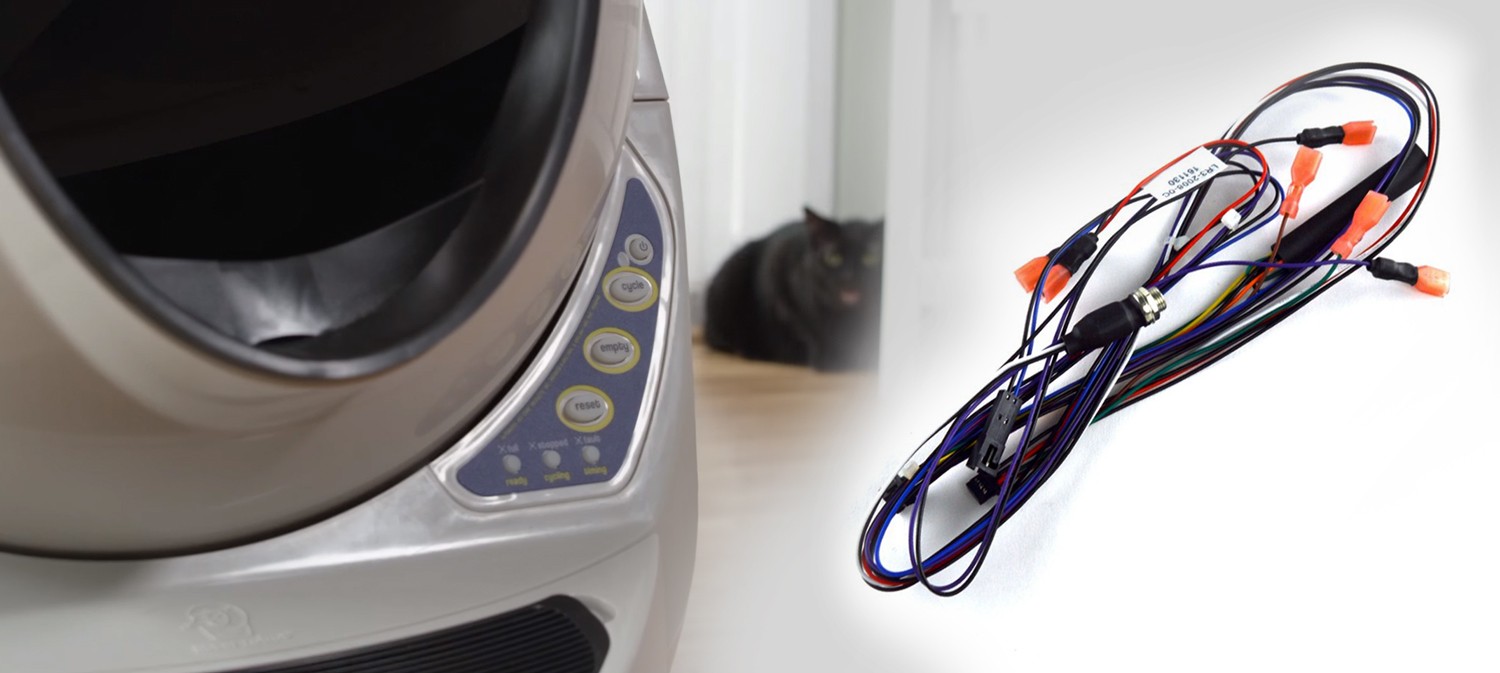
Note: The Hall Effect Sensor is part of the Wiring Harness and is not sold separately.
Step 1: Open the Control Panel
- Unplug your Litter-Robot's power supply (so that it has no more power)
- Carefully remove the bonnet and the globe
- Locate the 5 screws on the top of the base and unscrew them

Step 2: Locate the circuit board and sensors
- You should now see the motor, the circuit board, and the Hall Effect Sensors.
- Gently unplug the 3 connectors on the motherboard and remove it.
- Unplug the 2 connectors of the motor and remove it.
- Remove the tape on the Hall Effect Sensor.
- Locate and remove the wire locker (yellow arrow).
Note: The Hall Effect Sensor is wired to the harness and you won't be able to remove it for now.

Step 3: Open the Base
- Turn the base upside down and make sure there is no loose part left in the control panel.
- Remove the 9 screws.

Step 4: Remove the whole Harness
- Carefully unscrew the Power Jack using a pair of pliers (do not lose the nut and the washer).
- Unplug the Cat Sensor's connector (blue and black wires).
- Unplug the Bonnet's wires (purple and black wires).
- Gently remove the Battery wires (red and black wires).
Note: Make sure you take good notes of how the wiring is made.


Step 5: Install the new Wiring Harness
- Plug back the Cat Sensor (blue and black wires).
- Pass the battery connectors in the small hole (red and black wires).
- Screw back the Power Jack Connector (white and black wires).
- Plug back the Bonnet's connectors (purple and black wires).
- Pass the Hall Effect sensor through the hole in the Control Panel.

Verify the installation of the Hall Effect Sensors in the plastic guide :

Step 6: Install the Control Panel back
- Make sure all the wires go under the Motor.
- Clip the Wire Locker back.
- Install the motor (Wiring: red with green, white with brown).
- Install the plastic part with the Hall Effect Sensor in its place.
- Add a piece of tape on the Hall Effect sensor to secure it.
- Plug back the 3 connectors on the Circuit Board.

Step 7: Close back the unit
- Clip the main board on the plastic panel.
- Screw back the 5 screws (make sure the wires are all secured in place and not unplugged in the process).
- Screw back the 9 screws in the back of the base.
Step 8: Plug it and test it
- Once the unit is reassembled, install the globe (Double check that the motor's gear is well fitted in the groove of the Globe).
- Clip back the bonnet.
- Plug the power supply.
- If the unit doesn't power up automatically, press on the Power Button.
- Let the unit cycle
- Enjoy the repaired unit
Conclusion
I hope this helped you fix your Litter-Robot III and that the process was simple and easy to understand. Do not hesitate if you have any questions concerning the product or any issues with the replacement of the Wiring Harness. You may post any related questions in the comment section of this blog and it will be my pleasure to answer you.
Thanks for helping to keep our community civil!
This post is an advertisement, or vandalism. It is not useful or relevant to the current topic.
You flagged this as spam. Undo flag.Flag Post