


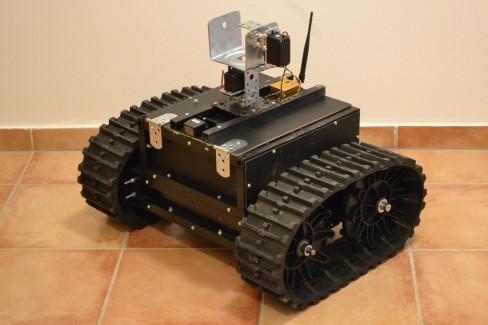
Tracked robot Mk3
Parts:
- DC motors 250W, of ebay
- Tracks and wheels are from a snow blower (bought from a local hardware and machinery dealer)
- Aluminium frame is from local hardware store
- Motor controller 2x25 Sabertooth
- Remote controller Turnigy 9x
- 12V battery 18Ah
**** UPDATE (2016-10-23) ****
I finally found time to finnish this bad boy. It's a quite powerful beast for bashing around and also to do some useful and cool stuff with the pan/tilt and on board camera.
I already have new ideas for a new robot so (sadly) I will sold this one on ebay so I can buy new components for the new robot I will build during the winter.
**** UPDATE (2016-07-03) ****
I closed the super structure that will carry the pan/tilt mechanism. I also added the kill switch and voltage indicator. Now I have to make the mount for pan/tilt and also the electronics to make it work.


**** UPDATE (2016-06-18) ****
I painted the frame, added wooden panels to close it up and added a superstructure that covers the interior and will support the pan tilt mechansm. I also added a kill switch and battery voltage indicator.
Pan/Tilt mechanism


The biggest chalange I had was to couple the motor axle with the wheel. Luckly my friend is a metal fabricatior and he was able to custom made the axle mount. If you guys have any good ideas how to mount motor axles to wheels please let me know.
**** (2016-05-07) ****
First I did wooden frame to see the scale, examine possible motor positions and axle mount location.

Then I made aliminium frame with holes for motor mounting.

All the parts layed out.

Assembling in progress.
